
- Introduction
- Getting started with TDS Classic
- TDS Classic Architecture
-
Using TDS Classic for Sitecore Development
- The Sitecore databases
- Working outside the web root
- Solution Structure
- TDS Classic project property pages
- Deployment Properties
- Visual Studio Property Window
- TDS Classic Options Window
- Deployment Property Manager
- Adding Sitecore items to a project
- Updating Sitecore Items in a project
- Quick Push Items
- Sync Sitecore Roles
- TDS Solution Features
- Sitecore Item Merge
- Global Config
- Sitecore Rocks
- Upgrading to Yaml
- TDS Classic Builds and Deployment
- Code Generation
- Web Deploy files
- Containers
Sitecore TDS
Getting started with Sitecore TDS
System Requirements
- Sitecore TDS has been fully tested with Team Foundation Server and Subversion, but will also work with any Microsoft compliant source control system.
- Visual Studio 2013, 2015, 2017 and 2019.
- Sitecore version 7.0 and higher.
Installation
Installing Sitecore TDS is a quick and easy process. It is recommended that you shut down all running applications prior to beginning the install process. The zip file you downloaded from the Sitecore TDS website contains a version of Sitecore TDS to match up with the version of Visual Studio that you are running.
| Visual Studio version | Sitecore TDS version |
|---|---|
| Visual Studio 2013 | HedgehogDevelopmentTDS_2013.msi |
| Visual Studio 2015 | HedgehogDevelopmentTDS_2015.msi |
| Visual Studio 2017 | HedgehogDevelopmentTDS_2017.msi |
| Visual Studio 2019 | HedgehogDevelopmentTDS_2019.msi |
Unzip the files to a directory of your choice to install from. Once you selected the version of Sitecore TDS that matches the version(s) of Visual Studio you work with you are ready to install.
By default Sitecore TDS wants to install the project templates (TDSProject.zip) in the My Documents folder on your C: drive. Located at:
C:\Users\[Username]\AppData\Local\Microsoft\VisualStudio\11.0\ProjectTemplates
If you have relocated the My Documents folder to a different directory, the Visual Studio path does not get updated.
You should make sure that the Visual Studio User Project Template Location in Visual Studio is pointing to the desired location. You can do so by:
In Visual Studio go to Tools > Options menu.
Under the Projects and Solutions highlight the General settings
Locate the Visual Studio user project template location. Verify that this path is correct. For example in VS 2013 it should be: Path to directory\Visual Studio 2013\Templates\ProjectTemplates
Click OK when you are done and now you should see the Sitecore TDS Project Template when you try to create a new project.
Also, please note that if Visual Studio is running in Safe Mode add-ins are NOT loaded.
Step-by-Step Instructions
Once you have downloaded the Sitecore TDS .zip package and extracted the version(s) you wish to install you may begin to install Sitecore TDS.
- Start by double-clicking the .msi file to begin the installation
- Click Next to begin the process of installing Sitecore TDS
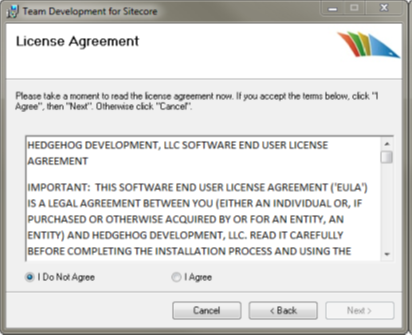
- Read and accept the license agreement. Then click Next.
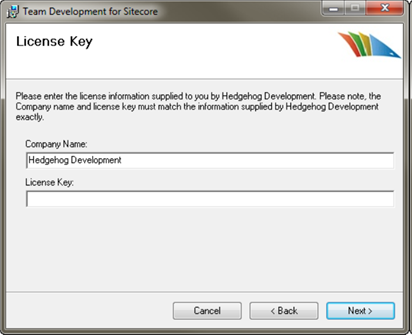
- Enter the license key provided by Hedgehog Development. Make sure the company name is spelled exactly as specified with your license key. Do not put quotes around the company name or the license key.
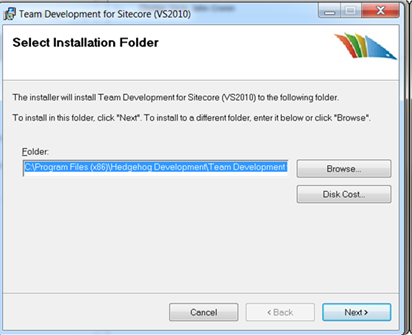
- Select the path where you want Sitecore TDS installed. Typically, the default value is acceptable.
- Confirm the installation by clicking Next.
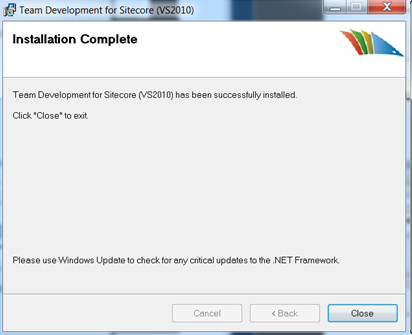
- When the installation is complete the following will appear.
Updating the Sitecore TDS License
After you have installed Sitecore TDS you may need to update the license you are using, e.g. when moving from a trial license to a full license. You can do this by opening Visual Studion and click on the Help menu then View Sitecore TDS License:
The Sitecore TDS License dialog will appear showing you your current license:
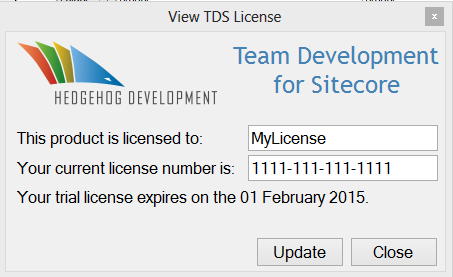
Enter your new license details and click update to change the license.
Initial Configuration
We will now show how to configure Sitecore TDS for an existing Sitecore project. Syncing Sitecore TDS with an existing Sitecore project is quick and simple. There is no need to start a Sitecore project over, or laboriously move existing code just because you’ve downloaded a new plug in. Integrating an existing Sitecore project with a new Sitecore TDS project is extremely easy. Once Sitecore TDS is configured, Sitecore items are added through the “Get Sitecore Items” option. Before we begin configuring Sitecore TDS, there are some assumptions that we need to consider.
There are two mandatory conditions that must be met. They are as follows:
- Sitecore TDS has been installed.
- There is an existing Sitecore installation with a project currently under development. The team wishes to use Sitecore TDS to gain more control over their Sitecore Items.
(Optional) There is an existing solution with custom application code in a Web Application Project.
Create the Sitecore TDS Project
Adding Sitecore TDS to your development process is extremely simple. To create a new Sitecore TDS project, follow these simple steps:
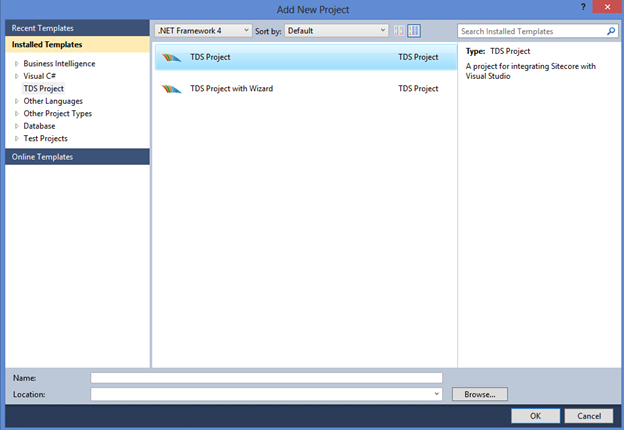
- In Visual Studio open the “New Project” dialog. You may want to add this new project to your existing solution, or create it stand alone.
- Choose Project type: “Sitecore TDS Project” and choose the template: “Sitecore TDS Project” then specify the desired name, location and Source Code Control (SCC) options (if applicable). For more information on the different project types see the Sitecore TDS Project Types section.
Connect the Sitecore TDS Project to Sitecore
Sitecore TDS installs a web service on the Sitecore server to communicate with the Sitecore database. There are a number of installation options and settings that will be covered in a later chapter. The steps below outline how to quickly get Sitecore TDS setup with a development server.
- Locate the Sitecore TDS project in the Solution explorer, right-click on it and select “Properties”. This opens the Sitecore TDS project property page.
- On the left side of the property page, click on “Build” to open the build property tab.
- There are three settings that need to be configured to tell Sitecore TDS how to find the Sitecore server.
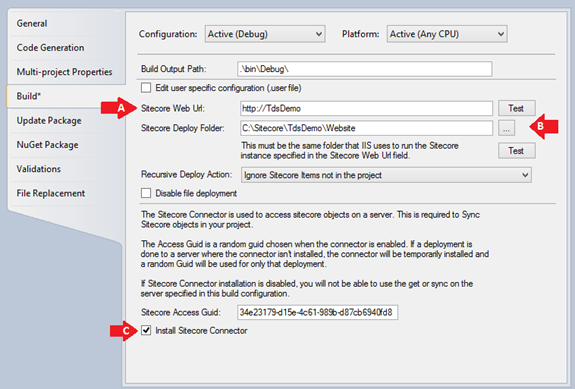
- Sitecore Web URL – This specifies the URL to local Sitecore install. This is the URL to the root of your Sitecore environment (not the /Sitecore folder). Sitecore TDS installs a web service to your Sitecore Deploy Folder and then communicates through that web service to push your changes to Sitecore. It finds the service via this URL.
- Sitecore Deploy Folder – This specifies the absolute path to the web root. This is the UNC path to the web root of the Sitecore instance you are connecting Sitecore TDS to. This tells Sitecore TDS where you want it to place the web service and copy the supporting DLL and configuration file to.
- Install Sitecore Connector – Checking this will allow Sitecore TDS to install the Sitecore Connector web service in your Sitecore instance. This allows access to Sitecore items on the server. This check box must be checked to complete this example.
- The last step is to right-click on the Sitecore TDS project and select “Install Sitecore Connector”. This installs the service to the target Sitecore instance specified in the build property page.
Adding Sitecore Items to the Sitecore TDS Project
Items are initially added to the Sitecore TDS project using the “Get Sitecore Items” dialog. This allows you the browse the items in your Sitecore content tree and pick the items to add to the project. To add a few items to your Sitecore TDS project, follow the steps below.
- Right-click on the Sitecore TDS project in the Solution Explorer and choose “Get Sitecore Items”.
- The Get Sitecore Items dialog will open and show the Sitecore items in the root of the content tree.
- Expand the template folder where you have created a few templates for your Sitecore solution. In the example below, it is /Template/MvcNewsApp.
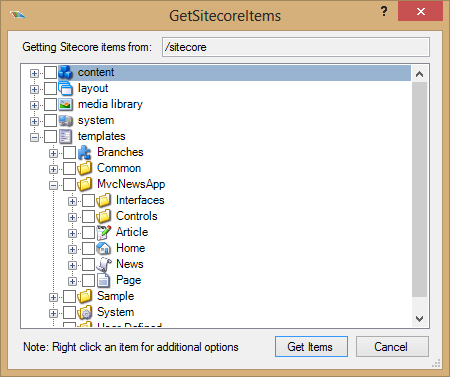
- Check the check-box next to an item to bring it into Sitecore. The dialog is aware of parent-child relationships, so checking a child item will automatically select the parents.
- If you want to bring all templates under the template folder you are using to hold your custom templates, you can right-click on the template and choose “Select all children”.
- Once you have selected the templates you wish to bring into your Sitecore TDS project, click “Get Items” and Sitecore TDS will begin getting the items
Choosing which items to bring into a Sitecore TDS project
Sitecore TDS allows you to bring any Sitecore item into your Sitecore TDS project. It is NOT best practice to bring every Sitecore item into the Sitecore TDS project for the following reasons:
- The source control system becomes a content management system.
- The source control repository becomes bloated with lots of files that are not part of the project.
- Media items tend to be large and are not handled well by source control.
- When upgrading to a new version of Sitecore, Sitecore may change many of their items. All of the changes made by Sitecore need to be merged and resolved in source control. This task is made more difficult because the developer may not be familiar with all of the changes or the reason the changes were made.
- Having many thousands of items in a Sitecore TDS project causes Sitecore TDS to require more memory and processor resources to keep track of the items. In some cases, that may cause performance issues within Visual Studio.
At Hedgehog Development, we try to determine the ownership of a given item to help us decide if the item should be included in the Sitecore TDS project. There are three roles we commonly find Sitecore TDS items falling into.
- Items owned by Sitecore – These are usually items that are in the /System or /Templates/System folder. They are usually part of the base install of Sitecore, or are installed as part of an add-in modules like Web Forms for Marketers. These items are not normally brought into Sitecore TDS because they are part of the infrastructure of Sitecore.
- Items owned by Developers – These items are almost always brought into Sitecore TDS. They are the “schema” of the Sitecore solution. These are items created by the developers such as Templates, Layouts, Sublayouts, Taxonomy and Metadata. These are items that are not edited by content editors.
- Items owned by Content Editors – These items contain actual content for the site. This is the data that drives the front end. In most cases, these items should not be in the Sitecore TDS project since they will be edited by the content editors outside of the deployment schedule.
The above roles are to be used as guidelines for determining which items should be included in the Sitecore TDS projects. In some cases, it may be necessary to bring Sitecore items into the Sitecore TDS project. This is usually done when the development team needs to make a change to a Sitecore owned item. After changing the item, it is owned by the development team. The item can now be easily managed by the development team, and if there is a conflict with the item after a Sitecore upgrade, it can easily be located and resolved.
Sitecore TDS Project Types
Sitecore TDS comes with different project types from which to create your Sitecore TDS projects. To access the different project types open the New Projects dialog in Visual Studio and select Sitecore TDS Project from the Templates list:
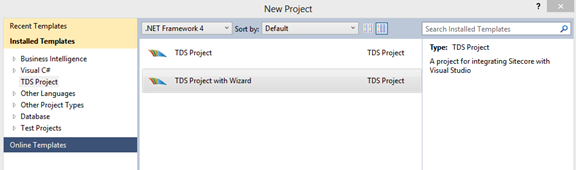
Sitecore TDS Project
Creates a new Sitecore TDS Project as part of your solution, you will then need to configure the connection to your Sitecore instance in the project property pages.
Sitecore TDS Project with wizard
Creates a new Sitecore TDS Project as part of your solution but then runs you through a wizard to help setup a Sitecore instance. The first screen in the wizard will ask you for the basic connection information:
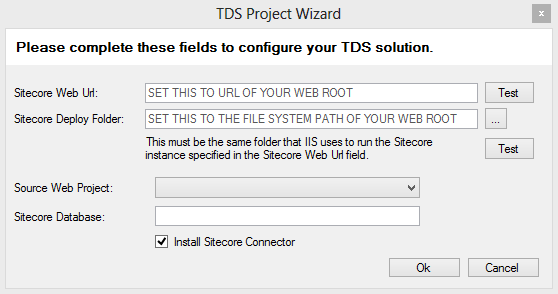
- Sitecore Web Url – the URL to the Sitecore instance that Sitecore TDS will connect to.
- Sitecore Deploy Folder – the path to the Sitecore instance specified in the Sitecore Web Url field.
- Source Web Project – the web project to use if you have one.
- Sitecore Database - the Sitecore database to read and write items to.
If you have multiple Sitecore TDS Projects in you solution and you enter a Sitecore Web Url used by another project the wizard will fill in the other fields automatically. Clicking ok will configure the project and install the Sitecore Connector if you checked it.