
Avtor

About Avtor
Avtor adds a new dimension to editing content on Sitecore websites. Before Avtor, making changes to multiple Sitecore items could take many steps. Avtor allows the content editor to choose the fields they are interested in editing and presents them with a view of those fields across all Sitecore items in the content tree. This allows the content editor to quickly review and update those fields.
Avtor can create new content items, but it is best suited to reviewing and updating existing content. This tutorial will show how to quickly get started with Avtor.
Starting Avtor
Avtor is easily accessible from a number of different places in Sitecore depending on how the content editor works with Sitecore.
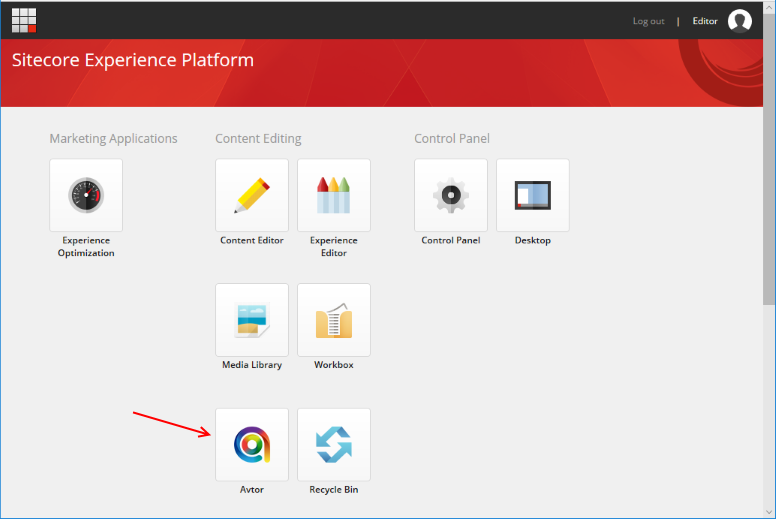
Starting in the launchpad
Avtor can be found in the Sitecore launch pad located in the same area as the other content editor tools.
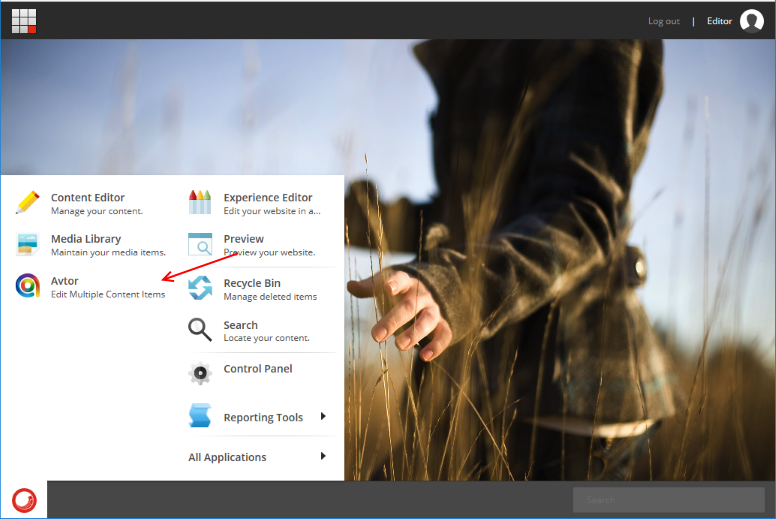
Starting in the desktop
Avtor can be started directly from the start menu in the Sitecore desktop.
Starting in the content editor
Avtor can also be stated directly from the content editor. This is the preferred way of starting Avtor, since the content editor can easily choose the starting location in the content tree closest to the content they wish to edit using Avtor.
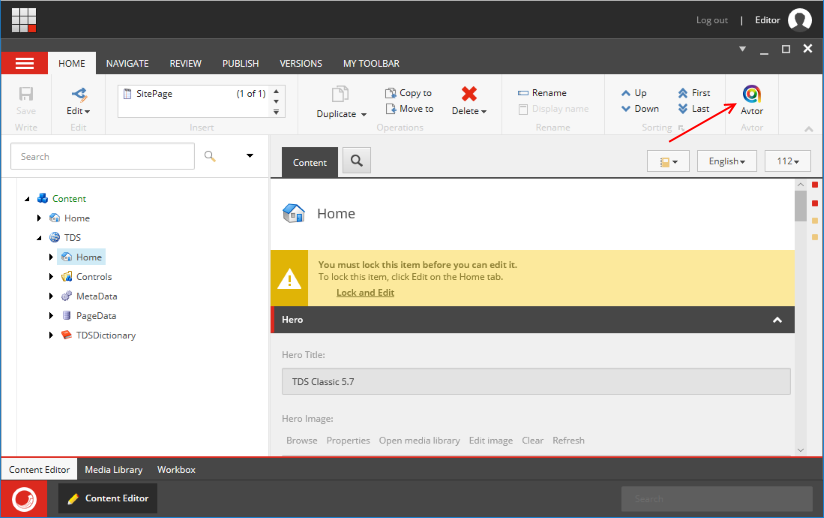
In the above screenshot, clicking the Avtor icon, will open Avtor at the /content/TDS/Home item. This will save the content editor from browsing to those items within Avtor.
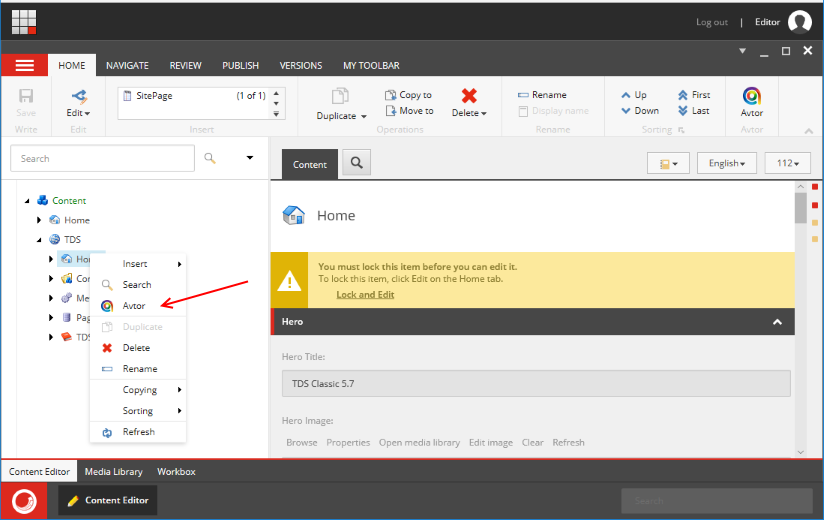
Starting in the content editor tree
Avtor can also be started by right-clicking on an item in the content editor and selecting the Avtor right-click menu item.
Editing fields in Avtor
The fields being edited by the content editor are selected and managed in Avtor “Field Sets”. Field Sets are a collection of fields chosen by the content editor to view and update. The content editor can create as many Field Sets as they need.
The content editor needs to choose which fields they wish to edit before they can begin to update content items.
Selecting Fields to edit in Avtor
When the content editor starts Avtor for the first time, they will be presented with an empty Avtor editor pane.
![]()
The content editor can quickly create their first Field Set by choosing an item from the content tree they wish to edit fields from and clicking on “Add Field Set” in the Home toolbar.
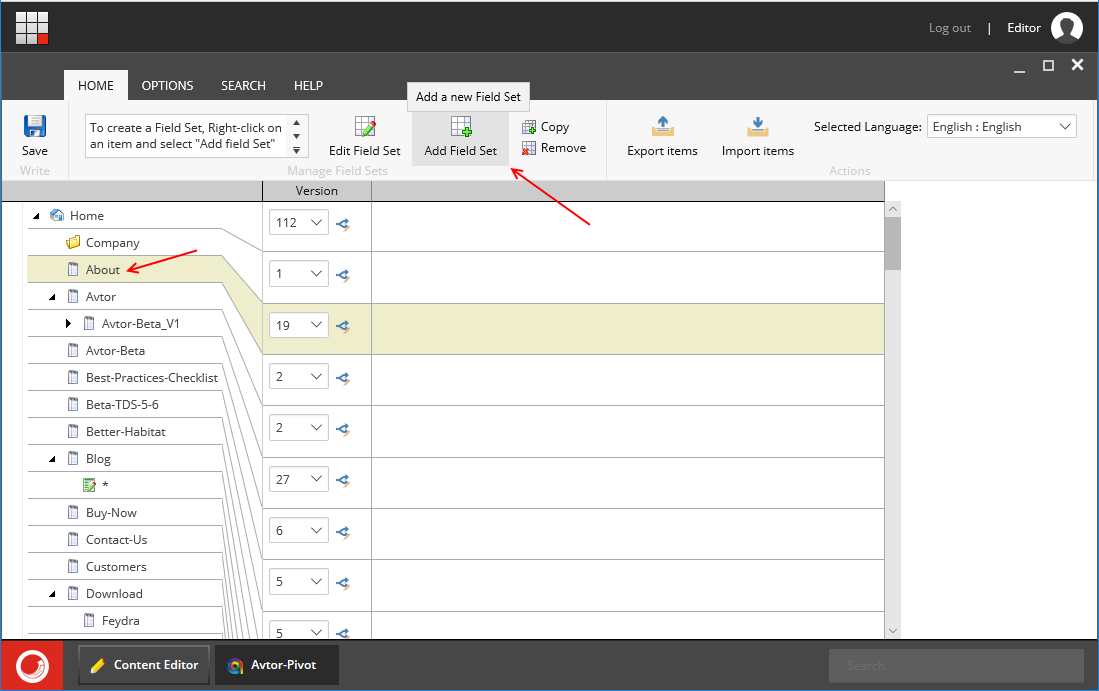
This will open the Manage Field Set dialog where the user can select the fields they wish to edit and also a name for the Field Set.
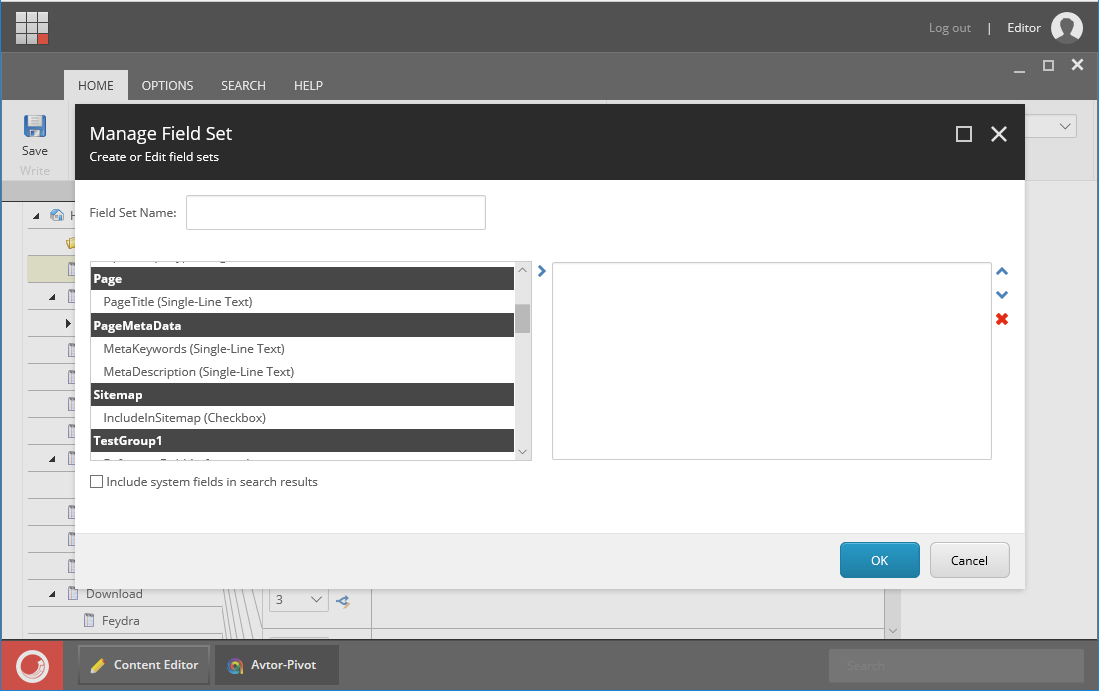
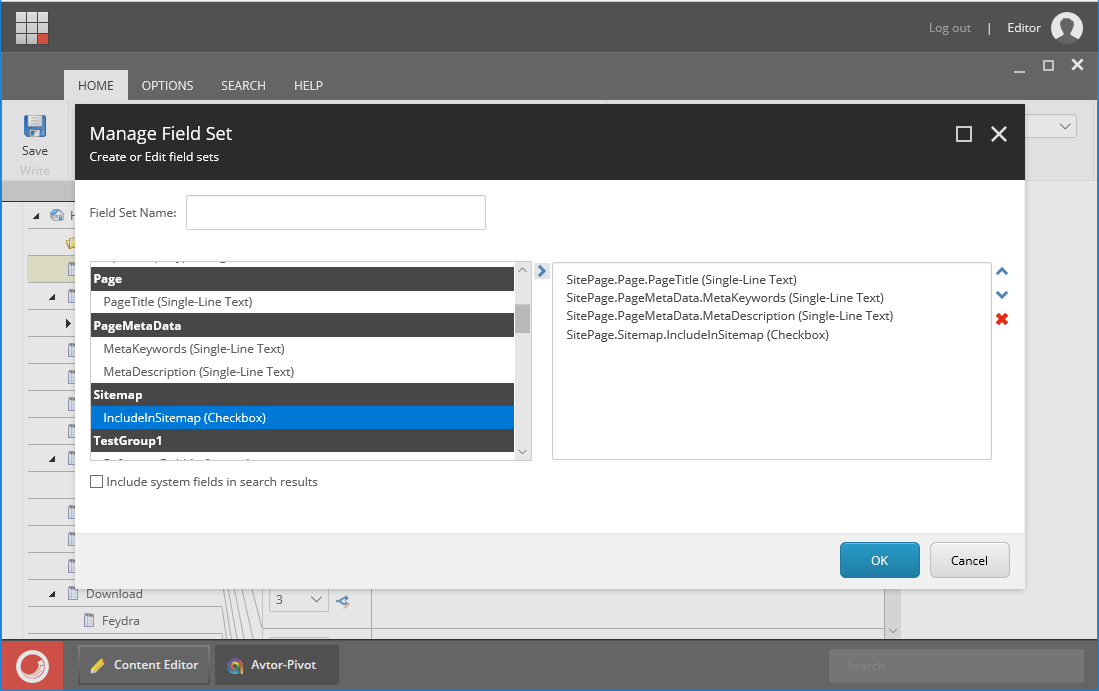
The content editor can select a few fields to edit by double clicking on the fields in the left side list. They can also select the field in the left and click on the ![]() icon. This will move the selected fields to the right-side list, where the list of fields being edited is kept.
icon. This will move the selected fields to the right-side list, where the list of fields being edited is kept.
Please Note: The fields shown in this example are specific to the Sitecore implementation used for this tutorial. The names of fields in your instance of Sitecore will be different, but should be familiar to the content editor, since they are fields they have been working with in the Sitecore content editor.
Once the fields are selected, the Field Set needs to have a name so the content editor can select these fields to edit again.
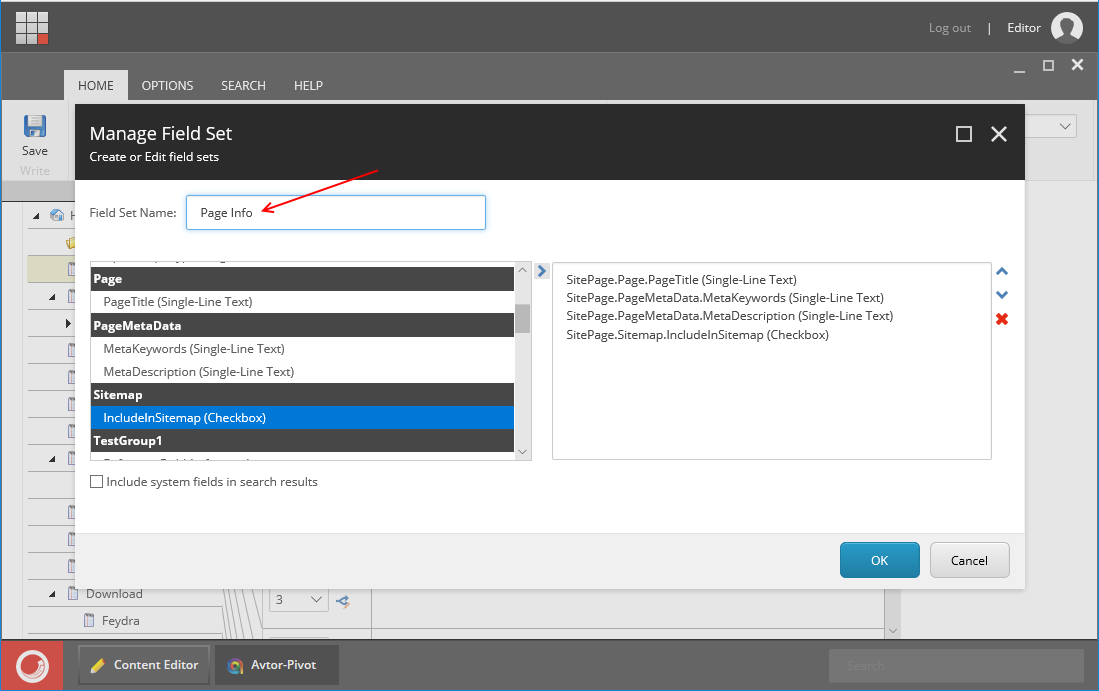
Clicking OK will close the Manage Field Set window.
Updating items in Sitecore
After creating or selecting an existing Field Set, the user can begin reviewing items in the content tree and making changes.
Users of Avtor will follow all of the same content editor rules they have followed when editing individual items in the content tree. They have the same permissions and need to follow the same workflow as they normally would. The Advantage to Avtor is they can perform these operations on many items at once.
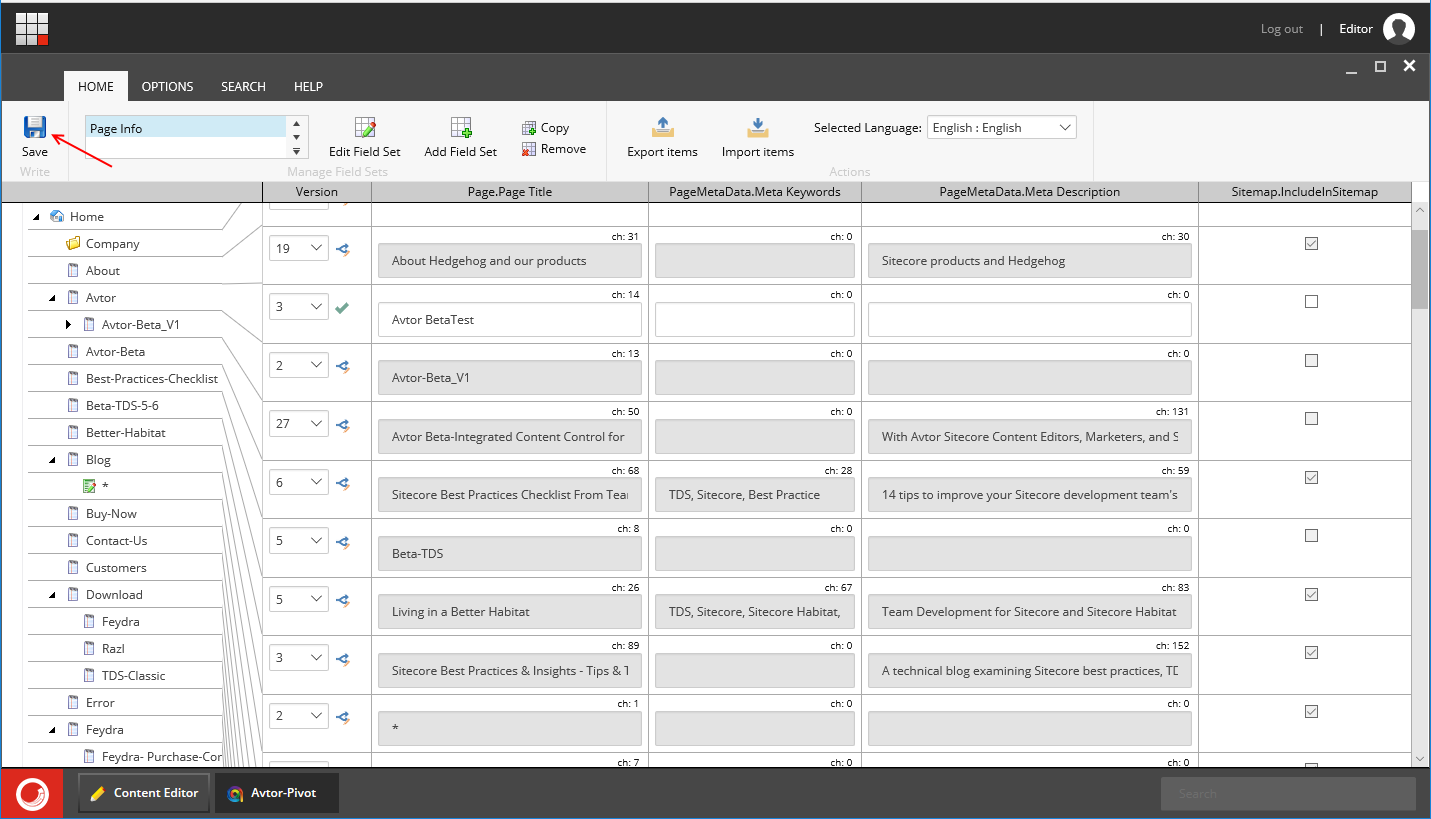
Here is an Avtor edit pane where a few fields have been added to a Field Set.
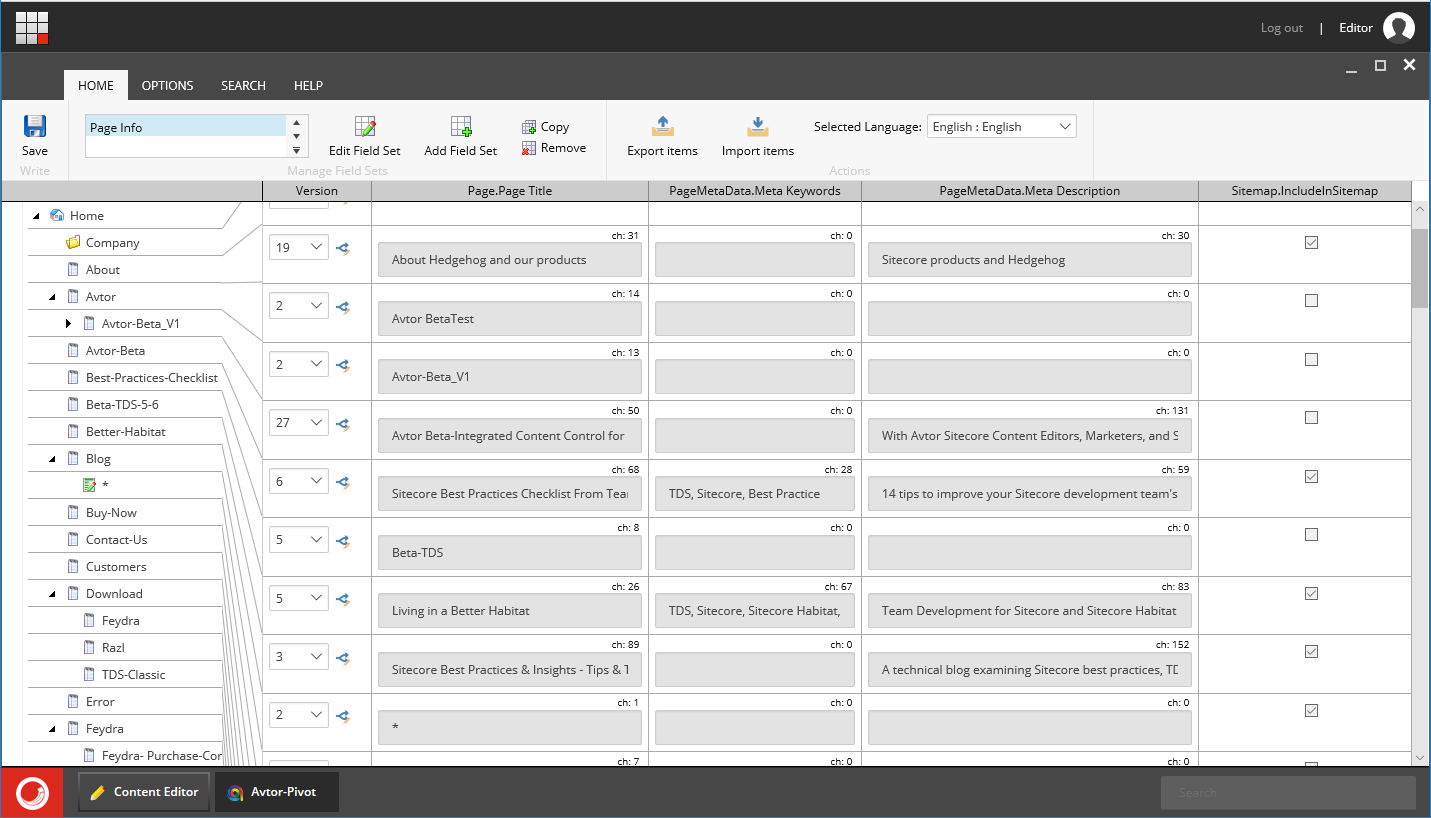
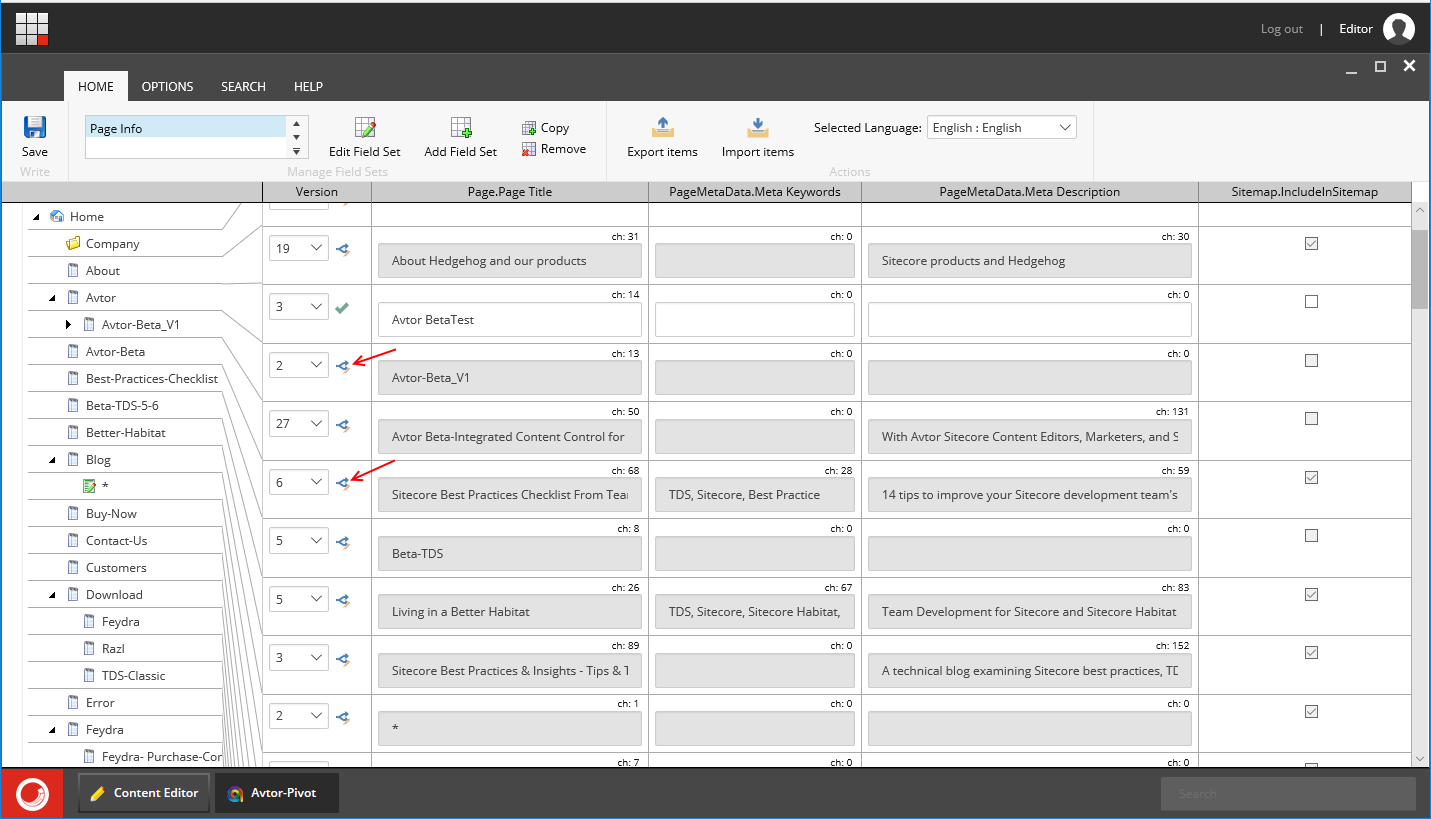
The fields in this screenshot are “read-only” because the items have not been locked for editing by the current user. If the current user already has items locked for editing, they will be immediately editable. To lock an item for editing, the user needs to click the ![]() icon to start editing the item. This icon is located in the “Version” column.
icon to start editing the item. This icon is located in the “Version” column.
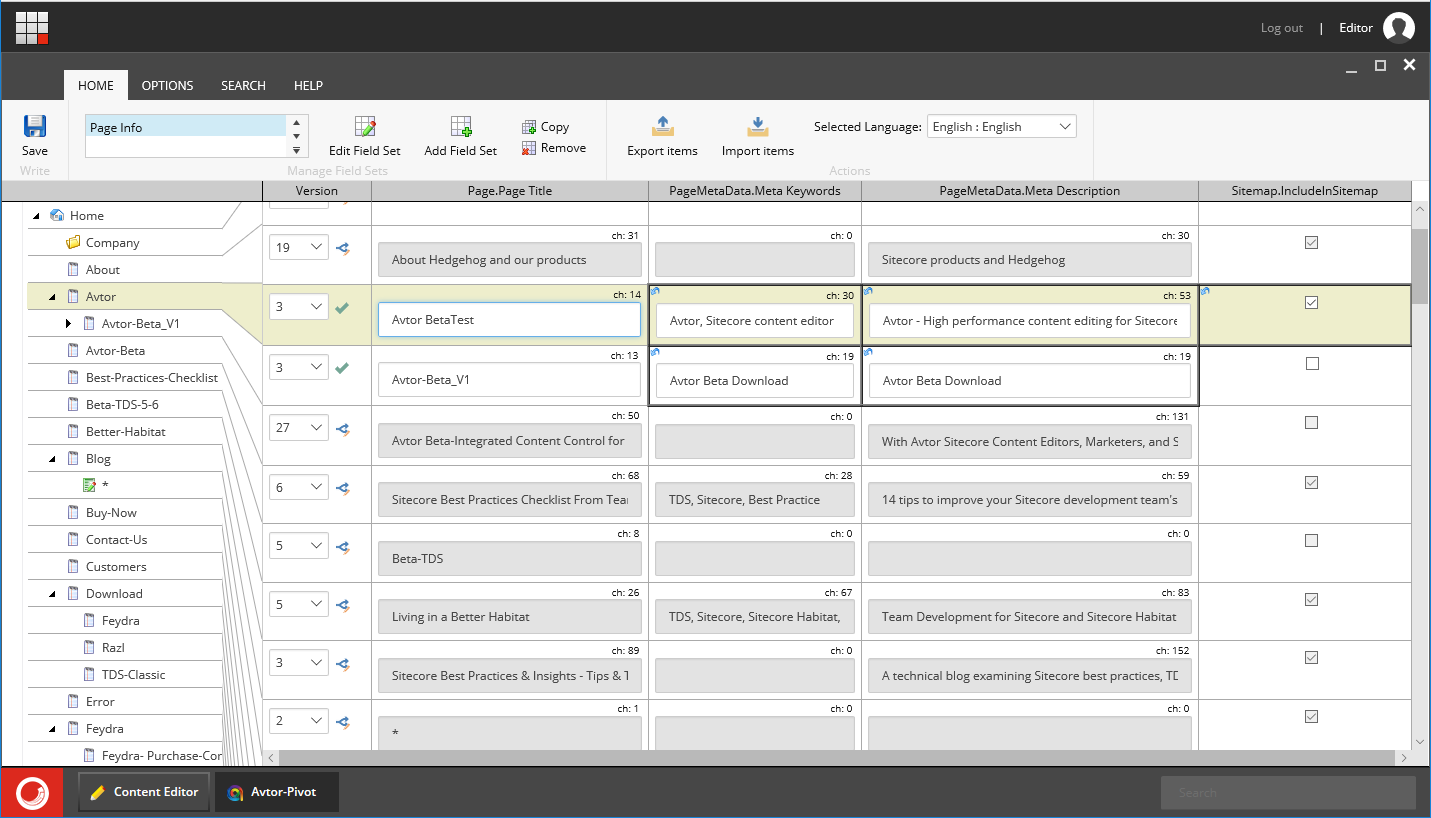
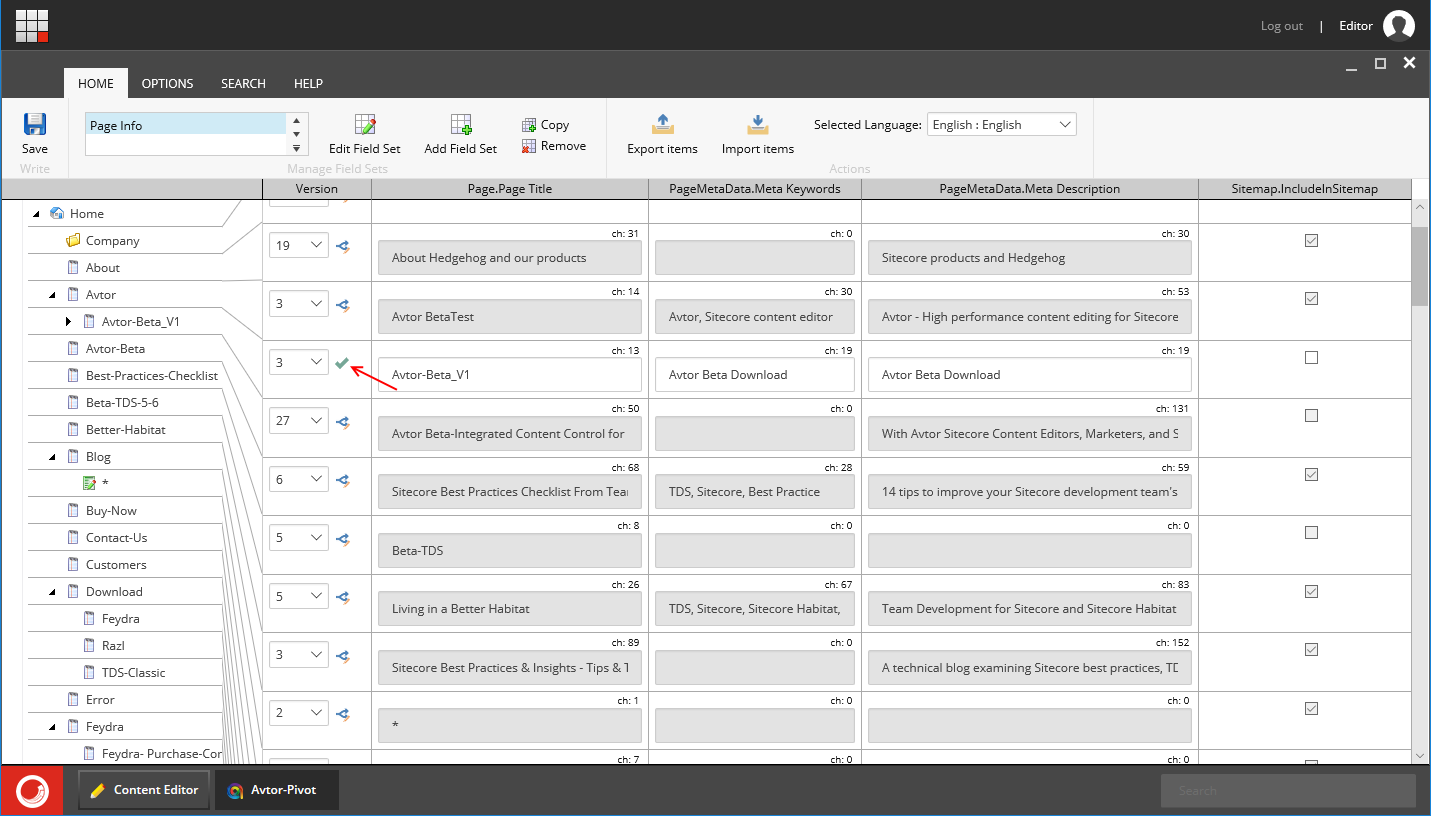
The content editor can click on any of the editable fields in the Avtor edit pane and begin updating the fields. As the fields are changed, they are highlighted so the user can track which fields have been edited. The screenshot below shows how the pane would look after a few fields have been updated.
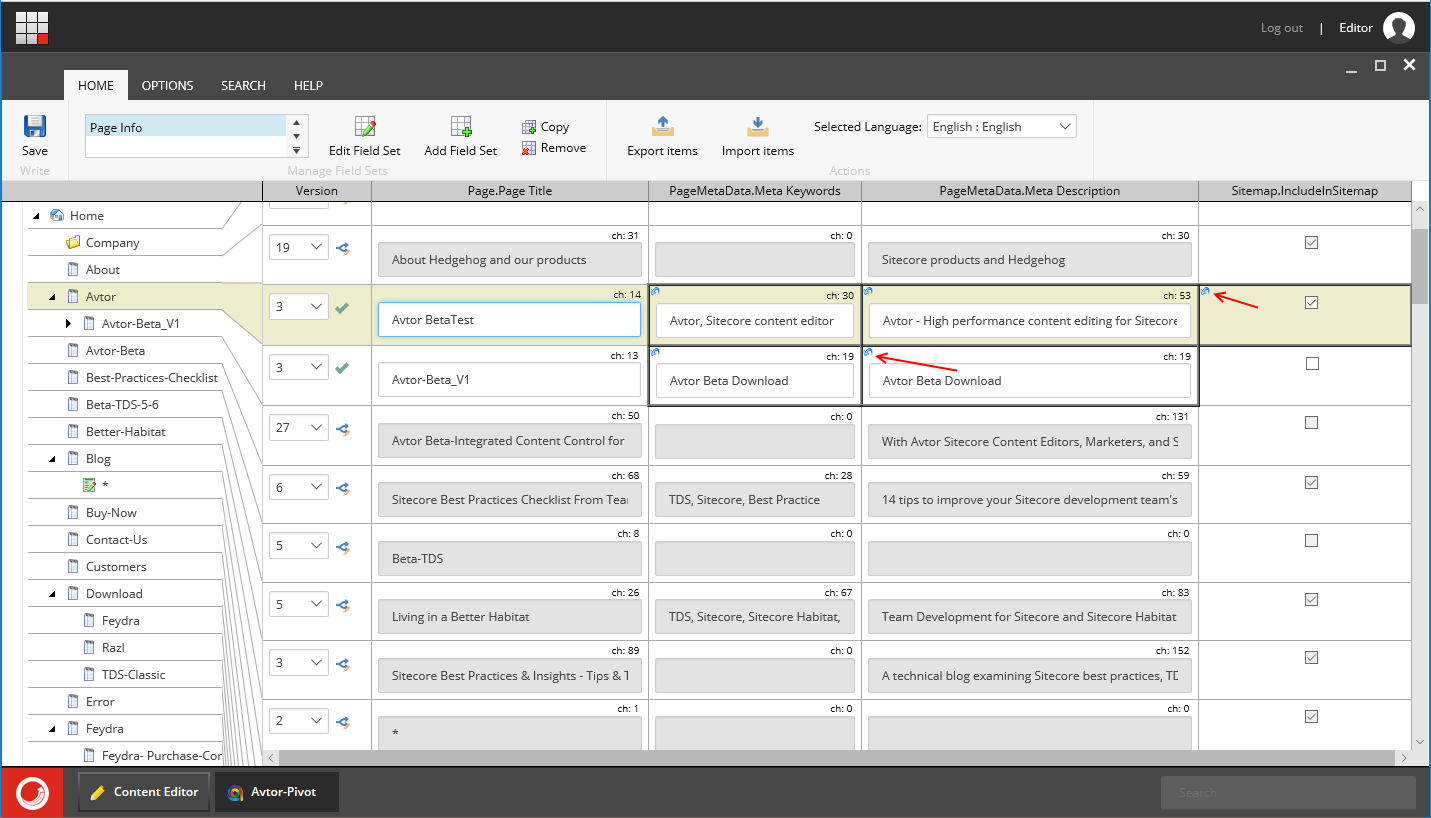
If the user makes a mistake editing a field, they can click the “Undo” icon at the top left of the field container. This will undo their changes.
Once the user has completed editing of the items in the tree, the user can click the “Save” button at the top left of the screen to save all changes to Sitecore.
After saving the item, the user can check the item back into Sitecore by clicking the ![]() icon. This will allow the item to be updated by other users and/or published.
icon. This will allow the item to be updated by other users and/or published.
Going further
This tutorial shows the content editor how to get started with Avtor. There are many other features of the tool like:
- Workflow
- Automatic check-in
- Item buckets
- Export to Excel
- Import from Excel
- Search for items
Please see our documentation topics for additional information on these features.