Sitecore Razl
Comparing Sitecore Databases
Once you have two Sitecore connections setup (see Creating a Connection) you can start to compare Sitecore instances.
Setting up for comparison
To setup Sitecore Razl for comparison select a connection in the Left Connection dropdown and the Right Connection dropdown. Sitecore Razl will automatically start loading items from each Sitecore instance in the Content Trees:

Comparing Items
As you explore the Sitecore content tree Sitecore Razl will automatically load and start to compare items in both trees:

There are several basic symbols pairs in Sitecore Razl when comparing an items. Each symbol :
| Symbol | Description |
|---|---|
| Same - If no symbols are displayed both sides are considered the same. | |
 |
Different - This pair are display when the items in each database contain different data in their fields. You can then choose which side to copy all field values from. |
 or  |
Deleted - This pair are displayed when an item exists in one database but not in the other. The side that contains the item will display the red cross and allow you to remove it, the side that doesn’t contain the icon will display the black arrow and allow you to copy over. |
 |
Moved - An item this moved will have this symbol next to is’t name:  The item that is out of position (i.e. in another location) will be in light grey. To see where each item exists click on the item itself and use the Field Information panels to see each sides path. |
If the updated date of an item on one server is newer than the updated date of the item on the other server, a yellow star will be shown next to the item:

Lightning Mode
When you click the Lightning Mode  button, Lightning Mode will be toggled on and off. When Lightning Mode is enabled, Sitecore Razl only compares the revision ID’s of the items, making the compare very quick. If the revision ID’s are different, then an Item is considered different regardless of your filter settings. Sitecore Razl is much faster when Lightning Mode is enabled because all items in the folder are retrieved at once, and the comparison doesn’t look at all fields.
The main disadvantage to Lightning Mode is that your filters are ignored. This means that items may be considered different even though your filter specification would indicate that they aren’t.
When an item is clicked on in the tree, a full compare of the item is done and filters applied even if lightning mode is enabled. This may cause the item to loose it’s difference arrows if your filters exclude the changed fields, or gain filter arrows if a field is different, but the revision ID’ss are the same.
Deep Compare
Deep Compare allows all items in a Sitecore content tree to be easily compared. You can deep compare a folder by right clicking on the item in the tree and choosing Deep Compare

Deep Compare looks at all items under a folder on both sides and shows differences in the change detail view.
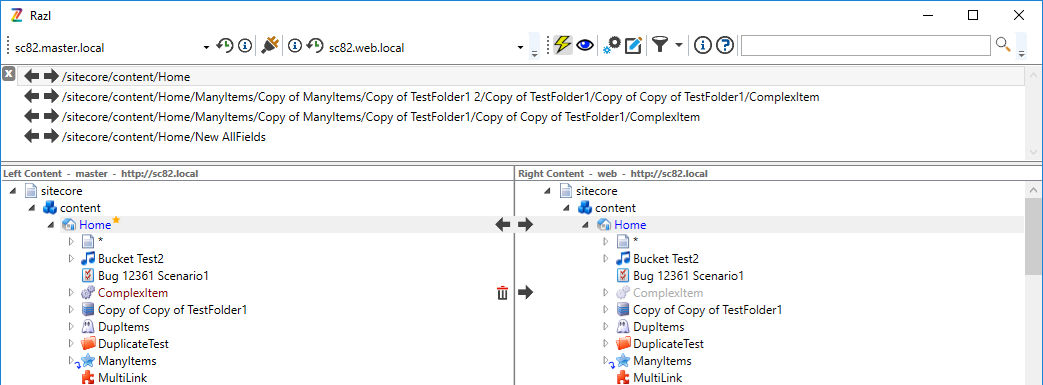
Once the Deep Compare operation completes, you may use the arrows on the left to move an item from one server to another and double clicking on an item finds it in the tree.
After performing a Deep Compare, Sitecore Razl will know if an item contains different items under it even if the item isn’t expanded. This is indicated on the item in the tree using a blue arrow need the expand toggle:

The blue arrow  shows after a Deep Compare when there are changes under an item and the item hasn’t been expanded.
NOTE: Deep Compare will only compare Revision ID’s regardless of your Lightning Mode setting.
Searching for Items
Sitecore Razl can use the Sitecore content indexes to find items in the content tree on both servers. Simply enter text into the serch window and Sitecore Razl will look for those items on both servers using the Sitecore Content Search API. When Items are found, they are shown in the item list pane.
If the items are different between servers, they are shown at the top of the list.

Items in the search results work the same way as results from Deep Compare. You may use the arrows on the left to move an item from one server to another and double clicking on an item finds it in the tree.
Comparing Fields
When you click on an item in the Sitecore Content Tree, Sitecore Razl will load the fields and information about the item and display them in the Field Information panes. Sitecore Razl will then show you the individual fields differences, you can then select each fields to move between servers:

Fields are grouped together based on the following rules:
- Shared fields
- Language/Unversioned
- Language/Version
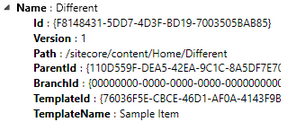
The Field Information pane also displays information about an item beneath the “Name” node:
There are several basic symbols pairs in Sitecore Razl when comparing fields:
| Symbol | Description |
|---|---|
| Same - If no symbols are displayed both sides are considered the same. | |
 |
Different - This is displayed when the field values don’t match. You can then choose which side to copy the value from or open the field value editor. |
 or  |
Deleted - This pair are displayed when an field exists in one database but not in the other. The side that contains the item will display the red cross and allow you to remove it, the side that doesn’t contain the icon will display the black arrow and allow you to copy over. |
 |
Block - No action can be performed. This is normally due to a field existing in one instance but not the other instance. |
The Field Value Editor
The field value editor allows the user to edit field values before selecting them to be moved between servers. This is very useful for complex sitecore fields like multi-list and rendering fields. The field value editor will choose an the appropriate editor for the field type.
Text Field Editor
The Text Field Editor allows the user to view field values side-by-side. The user can move the entire field from one server to the other by using arrows, or edit the contents of either field by clicking on the field and entering new text.

Multi-List Field Editor
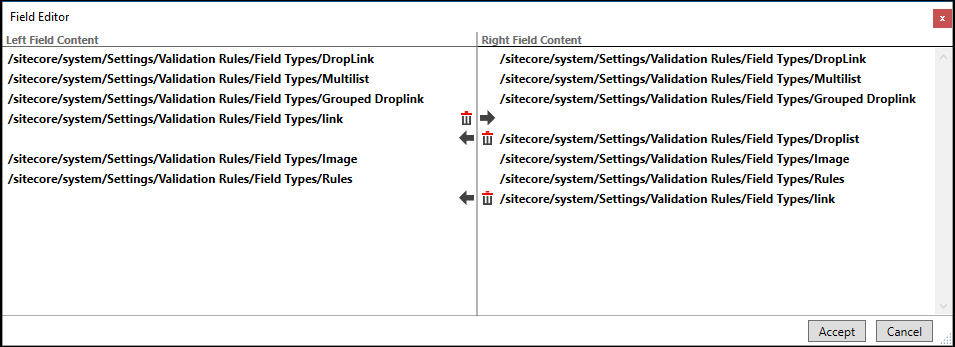
The Multi-List Field Editor allows a user to view and edit Sitecore ID list fields in a very user friendly way. Each ID is shown on its own line, and ID’s are lined up so matching ID’s share the same line on the left and right sides.
The user can move individual ID’s left or right, and ID’s can be dragged up and down in the list, allowing them to be re-ordered.
When Sitecore Razl opens the Multi-List Field Editor, it will check to see if the ID’s in the list exist on the server and automatically replace the ID’s with thier paths. This is only for display purposes. The original ID is still stored in the Sitecore field. When an ID is replaced with a path, the path is shown with bold text, indicating it has been replaced. Hovering the mouse over a Sitecore path will show the original ID in a tool tip.
Xml Field Editor
The Xml Field Editor allows users to easily edit and update Xml fields in Sitecore Razl. The XML editor attempts to line up Xml elements by their ID, and displays each attribute of the element on it’s own line. The user can move individual attributes left or right or move the entire element and all it’s children.
Like the Multi-List Field Editor, the Xml field editor will locate Sitecore ID’s and replace them with their paths.

Controlling Comparison
By default Sitecore Razl will compare all the fields on an item and all languages of that item, however it is possible to control which fields and languages are compared by Sitecore Razl. This can be useful in scenarios where you might want ignore the updated date on an item or certain languages because they aren’t used.
Ignoring a Field
Follow the following instructions to ignore a field:
- Connect to a Sitecore instance
- Select and item in the Content Tree
- Using the Field Information pane find the field you wish to ignore
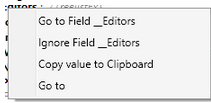
- Right click on the field and a context menu will appear:
- Click the Ignore Field
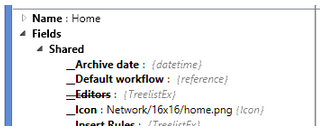
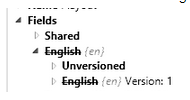
When a field is ignored Sitecore Razl will re-compare all loaded items and the fields name will have a strikethrough:
Unignoring a field
Follow the following instructions to ignore a field:
- Connect to a Sitecore instance
- Select and item in the Content Tree
- Using the Field Information pane find the field you wish to ignore
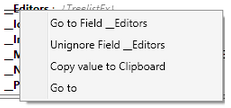
- Right click on the field to unignore and a context menu will appear:
- Click the Unignore Field option
Ignoring a Language
Follow the following instructions to ignore a language:
- Connect to a Sitecore instance
- Select and item in the Content Tree
- Using the Field Information pane find the language you wish to ignore
- Right click on the language and a context menu will appear:
- Click the Ignore Field
When a language is ignored Sitecore Razl will re-compare all loaded items and the language name will have a strikethrough:
Unignoring a language
Follow the following instructions to ignore a language:
- Connect to a Sitecore instance
- Select and item in the Content Tree
- Using the Field Information pane find the language you wish to ignore
- Right click on the language to unignore and a context menu will appear:
- Click the Unignore language option
Hiding unchanged fields
The Hide Unchanged Fields  button will toggle showing/hiding fields that are different.
When hide unchanged fields is off  , the field window will show all fields even if they are the same.

If hide unchanged fields is enabled  , the field window will show only fields with differences.

Compare Filters Dropdown
When you select to ignore either a field or language it is added to the compare filters dropdown in the toolbar:
Fields and languages are identified by the different symbols. By unchecking a field or language you will remove it from the filter and Sitecore Razl will run the item comparisons again.
Filtering Effects
When a field or language is ignored for comparison it stops the field/language from being compared when determining which symbols to display in the Content Tree. The field and language will still be compared in the Field Information pane when you select an item.
For example the English language is ignored in the image below, notice that the Content Tree shows that the item is the same but when the item is selected Sitecore Razl shows that the English fields are actually different:
Content Tree Context Menu
If you right click on an item in the Content Tree a context menu will appear with the following options:
| Menu Item | Description |
|---|---|
| Refresh | Forces Sitecore Razl to refresh the item data and reload child items. |
| Deep Compare | Compares all items under the selected item and shows the differences in the Change Details window. |
| Go To Template | Go to the template the item is based on. |
| Go To Branch | Go the the branch the item was created from. |
| Left References | Only appears on the left hand side. Lists all items that reference the selected item. Clicking on an item in the list will take you to that item in the Content Tree |
| Left Referrers | Only appears on the left hand side. Lists all items that the selected item refers to. Clicking on an item in the list will take you to that item in the Content Tree |
| Right References | Only appears on the right hand side. Lists all items that reference the selected item. Clicking on an item in the list will take you to that item in the Content Tree |
| Right Referrers | Only appears on the right hand side. Lists all items that the selected item refers to. Clicking on an item in the list will take you to that item in the Content Tree |
| Left Add Bookmark | Adds a bookmark to the connections bookmark collection. Bookmarks can be returned to using bookmark button in the toolbar. |
| Right Add Bookmark | Adds a bookmark to the connections bookmark collection. Bookmarks can be returned to using bookmark button in the toolbar. |
| Copy to Clipboard | Allows the user to copy information about the item to the clipboard. Selecting this menu item will open a menu, allowing the user to select the Item ID, Item Path, Template ID or Template Path to be copied to the clipboard |
| Copy item and Related from Right | Only appears on the left hand site. Copies the item and all items related to the item based on the contents of the link database. |
| Copy item and Related from Left | Only appears on the right hand site. Copies the item and all items related to the item based on the contents of the link database. |
| Get All From Right | Only appears on the left hand side. Copies all items from the right hand instance to the left hand instance including all children with merger and overwrite options. See Copy All in the Tasks Section. |
| Get All From Left | Only appears on the right hand side. Copies all items from the left hand instance to the right hand instance including all children with merger and overwrite options. See Copy All in the Tasks Section. |

